Breakaway Glass, Smashable Bottles, and Safe Movie Props
Every bar fight you’ve ever watched was fought with candy. Real glass never gets smashed over anyone’s head, and once you see how the fake stuff is made, you’ll spot the seams in every action movie from here on out.
There’s a moment in basically every action movie where a bottle comes down across somebody’s skull and bursts into a thousand harmless sparks. I watched that beat for years without giving it a thought. Then a friend who works indie sets opened his garage and showed me a milk crate full of amber “beer bottles,” each one wrapped in an old sock, and mentioned he’d cooked every one of them on his stove with a bag of sugar. Nothing in that shot is real. That’s the whole point of it.
Breakaway glass belongs to the oldest layer of the practical effects toolbox, and it’s one of the few tricks you can genuinely pull off at home for pocket change. What follows covers what the material is, how to cast your own bottle, which smash calls for which prop, and the working habits that keep a fun gag out of the emergency room. And I’ll be blunt about the uncomfortable part up front: fake glass is safer, not safe. A sugar bottle to the eye will still end a shoot day, a friendship, or a cornea. Veterans drill it into rookies.
Why Real Glass Never Hits a Head
Actual glass shatters into sharp, unpredictable fragments, and the human scalp and neck are crowded with arteries and tendons that don’t forgive surprises. Productions figured this out the expensive way decades ago, which is why breakaway glass turned into a standard prop category rather than a curiosity. Working crews treat every smashable as a stunt rig first and a set-dressing item second. It gets inspected, rehearsed, and cleared like anything else that moves fast near a face. No exceptions.
The physics the prop people chase is simple to state. You want something that holds together while an actor picks it up, looks convincing under warm set light, and then falls apart into dull, featherweight pieces the instant it takes a hit. Sugar glass usually manages all three. In dry weather, anyway.
Usually it delivers. When it fails, the culprit is humidity, not the recipe, and I’ll get there soon enough. It’s also worth knowing that even the professionals keep live humans away from anything remotely dangerous on set. When a scene needs glass breaking near a face, the stunt coordinator stages the hit, the camera angle sells half of what never happens, and the edit covers the rest. On union sets that coordinator’s sign-off is a legal requirement written into the contract, and backyard filmmakers should borrow the habit even when nobody’s paperwork says so.
A breakaway prop fails the same way real glass succeeds. It holds together too well, and then it keeps a jagged edge.
Sugar Glass: The Classic Recipe
Also called candy glass, and for good reason — it is candy
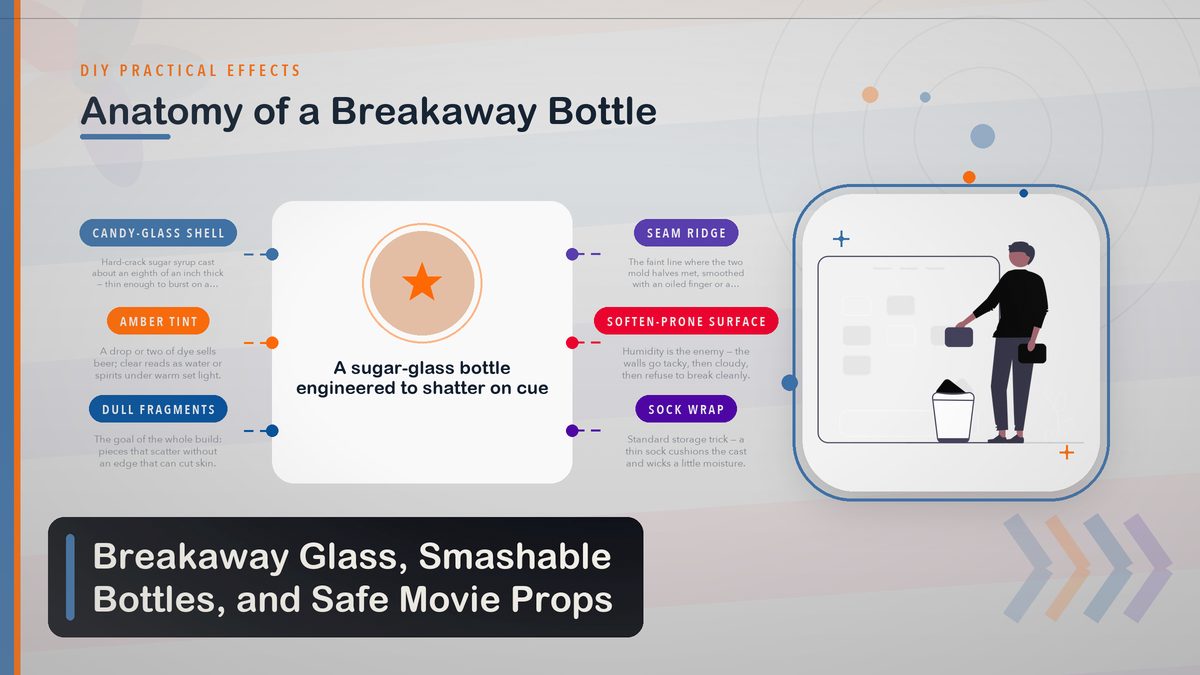
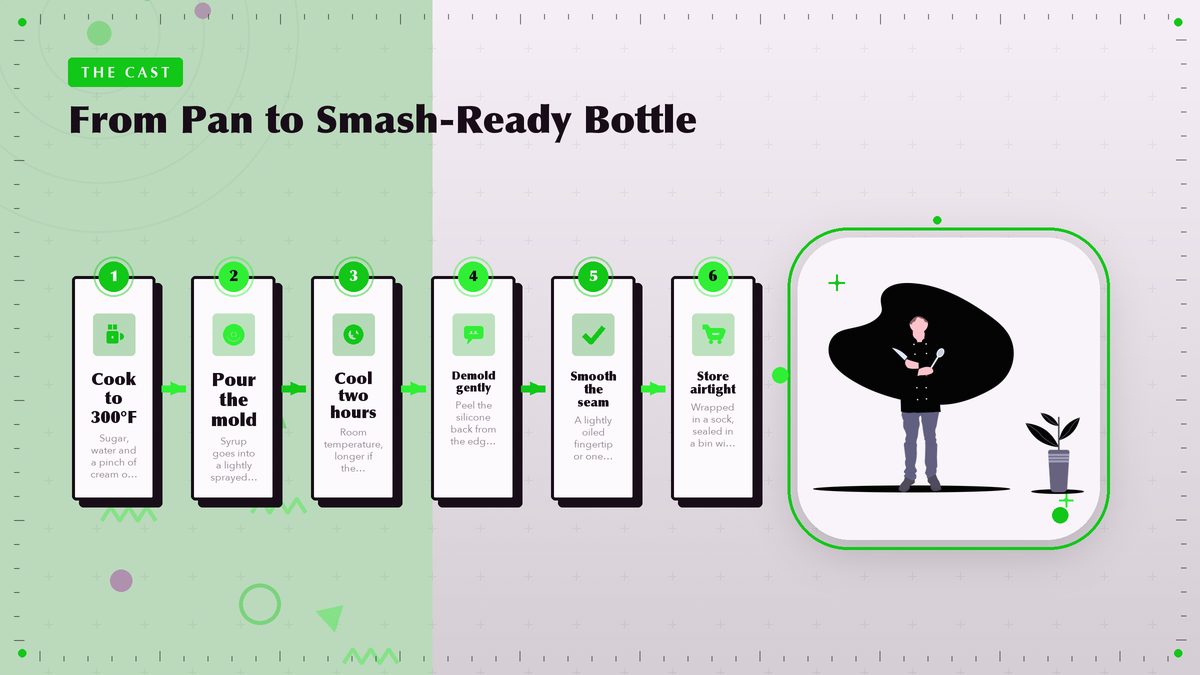
The ingredient list is short. Sugar glass is nothing more exotic than cooked sugar syrup poured into a mold and left to set into something that looks like glass and behaves, under a sharp knock, like ice. The Wikipedia page on sugar glass does a better job on the chemistry than I would, but the kitchen version goes like this. You dissolve three and a half cups of granulated sugar in a cup and a half of water with a pinch of cream of tartar, bring it up to roughly 300°F on a candy thermometer, stir in a little light corn syrup if you want a clearer cast, add a drop or two of food coloring, and pour the whole thing into a silicone mold you’ve hit with cooking spray.
Temperature discipline matters more than anything else in this process. Pull the syrup too early, around 280°F, and your bottle comes out with the backbone of a gummy bear; it sags in the actor’s hand and bends when tapped against a table. Leave it on the heat past about 320°F and the sugar starts to caramelize, which turns your crystal-clear blank amber whether you asked for that or not. Sometimes amber is exactly the goal, mind you, if the bottle is supposed to be beer. But you want to pick your color on purpose. Trust the thermometer.
Demolding rewards patience more than force. Give the cast a couple of hours at room temperature, longer if your kitchen is humid, then peel the silicone back from the edges instead of yanking the bottle out. The seam where the two mold halves met shows up as a faint ridge, and you can knock it down with a lightly oiled fingertip or one quick pass of a microtorch. Which, if you’ve been hunting for an excuse to buy a microtorch, congratulations. Worth every penny.
I said a couple of hours; eager cooks try ninety minutes and spend the next twenty minutes gluing a bottle back together with warm syrup. Don’t be that person.
Time is the cheapest ingredient in this whole craft.
Making the Mold First
You can’t cast a bottle without a bottle-shaped hole, and the standard approach is a two-part silicone mold taken from a real bottle. Pick a glass bottle with a shape you like, give it a thorough wash, and roll it in a thin coat of petroleum jelly so the cured silicone won’t bond to it. Then press platinum-cure silicone putty around one half of the bottle, clear up to the middle line, and poke two or three pea-sized dents into the putty to act as locators when the halves go back together. Those little dents matter more than you’d think, because the second half of the mold has to seat onto the first half with sub-millimeter accuracy or every cast comes out with a sloppy seam. Nothing exotic required.
Once the first half cures, flip the whole thing, coat the cured surface and the exposed glass with more release agent, and build the second half right over the top. When that cures you peel the two halves apart, pull the master bottle out (a little warm water helps if it fights), and cut a pour spout at the cap end with a sharp knife. Two pounds of putty covers a standard beer bottle with a bit left over, give or take. You now own a mold that will crank out blanks for years if you store it flat and away from heat. And that’s the whole mold.
Skip plastic masters. One detail the video tutorials gloss over is that the bottle you copy must be glass, because plastic flexes when you press putty against it, and that flex shows up in your casts as wavy panels that catch light wrong. Glass masters are rigid, they cost nothing at any recycling bin, and they release from cured silicone cleanly because the surface is smooth and non-porous in a way no plastic bottle ever manages to be.
Resin Breakaways: The Pro Shortcut
Sugar glass has exactly one mortal enemy, and it’s the same thing that ruins chocolate and good hair days. Humidity. Sugar always loses. On a muggy night, an exposed sugar bottle starts drinking moisture out of the air within hours, going tacky at the surface first, then cloudy through the whole wall, and finally about as smashable as a brick. For one night of shooting in an air-conditioned room, that’s fine. For a week of night exteriors in Louisiana, nobody in their right mind brings sugar.
The professional answer is a two-part polyurethane casting resin sold specifically as breakaway material. Smooth-On’s SMASH! plastic is the name you’ll hear on set. You mix the two liquids, pour them into the same silicone molds you’d use for sugar, and in a few hours you have a water-clear bottle that snaps dramatically on impact, shrugs off moderate humidity, and costs noticeably more per blank than a bag of sugar. The math flips fast. Worth it the moment you’re shooting multiple takes or working outdoors. Rental prop houses stock resin blanks by the crate, since a crate of sugar would be a crate of syrup by Tuesday.
Casting resin is the same dance without the stove. Mix, pour, wait, demold. Where the materials diverge is handling: a resin blank survives a short drop onto carpet, while sugar chips if you breathe on it wrong. I say that with affection. I’ve transported sugar blanks wrapped in bubble wrap inside a beach towel, held the bundle in my lap through an hour of driving, and it still felt like carrying a live hamster through a crowd.
Which Material for Which Smash
Pick per gag. Not every smash is a head hit, and the material choice follows the occasion, since what shatters politely against a padded skull may bounce right off a brick wall. Sugar glass is cheap, roughly food-safe, and perfect for one-and-done impacts. Resin tolerates weather, repeated takes, and throws where the prop lands on concrete. Sugar wins any gag you can only afford to shoot once; resin wins any gag you have to shoot five times.
| Smash situation | Material to reach for | Why |
|---|---|---|
| Bottle across a padded head | Thin-walled sugar glass | Shatters at the lightest contact; almost no weight behind the hit |
| Thrown against a wall | Resin breakaway | Survives the thrower’s grip and still explodes on brick |
| Actor stomps a “beer bottle” | Resin | Sugar cracks underfoot before the camera ever rolls |
| Bar brawl eating ten bottles | Sugar, cast in bulk | Ten resin blanks add up fast; sugar runs pocket change per unit |
| Outdoor shoot, muggy night | Resin, no contest | Sugar turns to gum outside within the hour |

Making the Hit Itself Safe
Material is half the safety story. The other half is choreography, and it’s non-negotiable even in a backyard. Whoever takes the hit wears eye protection you either hide from the camera or write into the wardrobe. Everyone standing downrange of the smash gets glasses too, because fragments travel sideways farther than intuition suggests. The impact point gets padding, a thin gel pad under a wig or a folded towel under a shirt, and the swing itself gets pulled so the bottle breaks on contact with the pad rather than on the follow-through of a full-arm swing. When in doubt, pull it shorter.
Rehearse with a rubber stunt bottle first. Every single time. A pulled swing feels wrong to beginners, who instinctively swing harder to sell the violence, and swinging harder is how a breakaway bottle meets a cheekbone instead of a pad. Watch how a stunt performer works and you’ll notice the whole craft in one principle: speed reads on camera, force doesn’t. Fast and light beats slow and hard on every take, and it’s the reason professionals make a bottle tap look like a bar stool to the skull.
Also steal this habit from working crews: keep a spray bottle of water and a push broom within arm’s reach, and shoot your cleanup insert right after the gag while the debris still lies exactly where it fell. Continuity will thank you.
Where Smash Shots Go Wrong
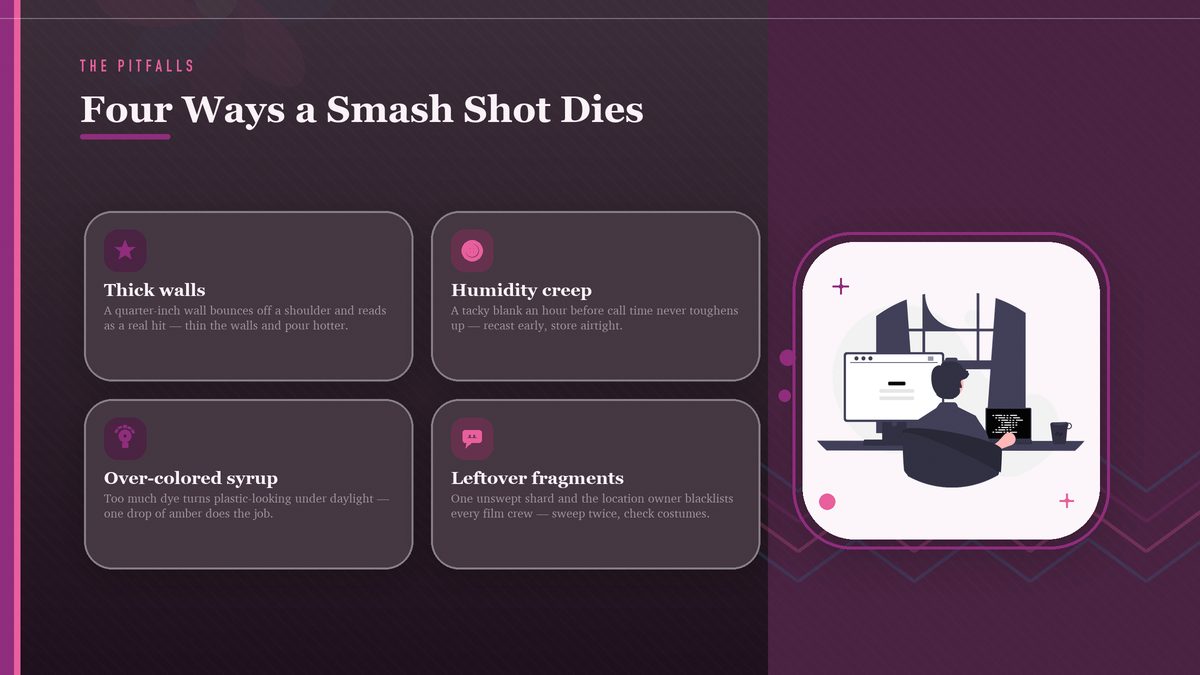
Most failed smash footage traces back to a handful of mistakes, none of them exotic. Casting the walls too thick is the big one. It happens constantly. A bottle with quarter-inch walls behaves like a real bottle, bouncing off a shoulder instead of breaking, and on camera that reads as a genuine full-strength hit, which is worse for your footage than any flubbed line. Thin your walls and pour your syrup hotter, and the break becomes reliable.
Humidity storage is the second failure. I’ve harped on it already, but here’s the field symptom to watch for: if a blank feels tacky an hour before call time, it is not going to toughen up by magic. So recast it. Over-coloring is the third mistake, a syrup loaded with dye turns plastic-looking under daylight when a single drop of amber would have done the job. And the fourth is forgetting that fragments are litter. One outdoor smash without a sweep, and you’ve handed the location owner a reason to never rent to a film crew again.
Beyond Bottles
Everything in this guide scales up. The same hard-crack syrup, poured a quarter inch deep into a greased sheet pan, becomes a breakaway window pane. Same syrup, bigger canvas. Stunt performers have been crashing through sugar panes since the Westerns of the 1940s because the material breaks away from a moving body with almost no resistance at all. Big panes crack more easily than bottles, so crews transport them standing vertically in padded frames and never, ever lay them flat in a trunk where one hard stop turns a day’s work into gravel.
Breakaway furniture follows the same philosophy with different materials. Balsa wood chairs and foil-wrapped “bricks” built to collapse under a stage-combat fall show up in fight scenes constantly, and if you freeze-frame your favorite brawl you’ll start noticing how often the set itself is rigged to lose. Once you learn to look for it, the whole action genre becomes a scavenger hunt for props that were designed to die on cue. You’ll see it everywhere now.
Storing Blanks and Cleaning Up
A sugar bottle left open on a shelf is a bottle-shaped puddle waiting for gravity to finish the job. Wrap each blank in plastic wrap or slide it into a thin sock (the sock trick is standard practice; it cushions the cast and wicks a little moisture), pack the wrapped blanks into an airtight bin with a desiccant packet, and they’ll keep for weeks in a dry climate. Resin blanks are far less fussy and will sit on a shelf without complaint, though a summer of direct sun will yellow them a shade or two. Keep the lid tight.
Cleanup after the gag goes faster than newcomers expect. Sugar fragments dissolve under hot water, so a hose-down handles most of an outdoor set; resin fragments sweep up like any plastic and go straight into the trash. Check costumes before anyone climbs into a car, because one shard inside a jacket liner announces itself an hour later, in traffic, at the worst possible moment. I have a story about a minivan that I won’t tell here, except to say the lesson stuck. Do a second sweep.
The cheapest effect in movies still fools people completely, because the trick was never the glass. It’s that nobody on screen flinches.
Cast a bottle this weekend and you’ll understand the entire gag through your fingertips. The weight is wrong, the seam is visible from arm’s length, and none of that survives eight feet of distance under warm light. Film the break in slow motion on your phone and you’ll see why professionals never stopped making these things even after CGI took over everything else. Real debris still behaves like real debris, and physics renders faster than any farm in California. Then smash it.
Sources and further reading: the Wikipedia pages on sugar glass, breakaway glass, stunt performers, and stunt coordinators, plus the manufacturer’s page for SMASH! plastic from Smooth-On. Related reads on this site: fake blood recipes that actually work, which pairs with any bar brawl, and DIY fog and haze for the after-hours look.