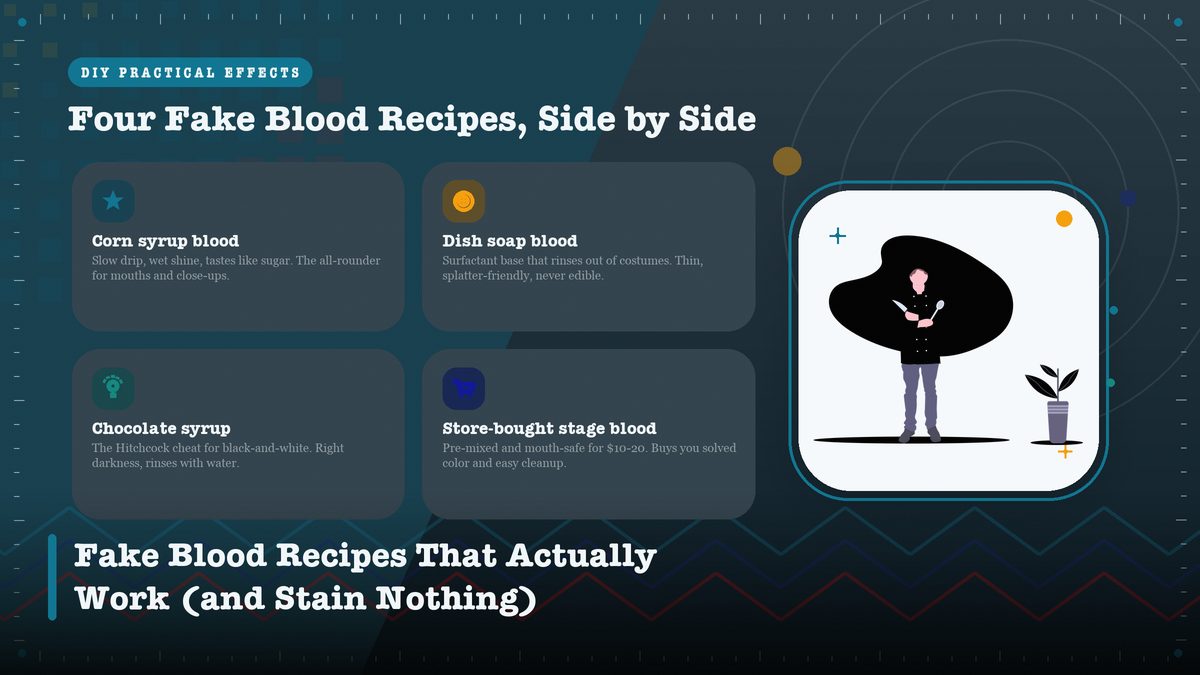
Fake Blood Recipes That Actually Work (and Stain Nothing)
Every indie horror shoot lives or dies by its blood. Here are the four recipes film crews actually use, the ratios that make them read as real on camera, and the cleanup tricks that keep your actors’ costumes out of the trash.
The first time I mixed fake blood in a kitchen, I followed a tutorial that called for a full bottle of red food coloring and nothing else. Looked great in the bowl. On my friend’s white t-shirt it looked even better, right up until that shirt stayed speckled pink through three wash cycles and one very awkward apology. Movie blood in miniature, that. The recipe that looks best in a cup is rarely the one you want anywhere near fabric, skin, or a rented location. Professional productions have mixed the stuff for decades under names like stage blood and Kensington Gore, and every serious version is a compromise between two competing jobs. It has to look wet and properly dark under hot lights, and it has to come off everything it touches before wrap.
Get both right and nobody thinks about the blood at all. Which is the point. Audiences clock bad blood in about half a second, but good blood earns no praise, because good blood just reads as injury. Below are the four recipes that cover nearly every low-budget situation, plus where each one falls apart and the small adjustments that keep your cleanup story boring.
What Fake Blood Has to Pull Off
Start with the physics, because blood on camera gets judged on color, viscosity, shine. Fresh blood runs darker than people assume, because that bright cherry red reads as candy; it flows slower than water, and it’s glossy, always, since wet skin and wet fabric catch light. Every recipe below is really just a different answer to those three properties, built from whatever’s cheap and washable.
Then there’s the second job, the one amateurs forget. Removal is half the job. A production is not a Halloween party. Costumes get worn again across multiple setups, the location owner wants the floor back the way it was, and somewhere around hour ten of the day, blood lands somewhere nobody planned. Practical effects live and die on cleanup discipline rather than the gag itself.
The audience clocks bad blood in half a second. They’ll never notice good blood, and that’s the entire compliment.
Film history also hands us some famous cheats. For the shower scene in Psycho, Hitchcock’s crew ran Bosco chocolate syrup down the drain because, in black and white, it read as blood while rinsing out of everything. The trick only works in monochrome, but the lesson generalizes. The right blood for the shot is the one that behaves correctly on camera and in the laundry.
Even the name Kensington Gore is a story. It was a real London street, and the blood sold under that name, supposedly cooked up by a pharmacist nearby, became so standard in British theater that the street name turned into the everyday word for stage blood. The old formulas were simple, just red dye and water plus something to thicken it. Honestly, not much has changed in a century, which tells you how little the problem actually demands.
The Pantry Classic: Corn Syrup Blood
Best all-rounder. Edible-ish, glossy, cheap. Handle it like sugar, because it is.
This is the recipe most people picture, and it earned the spot. Makeup legend Dick Smith popularized corn syrup blood for The Godfather and Taxi Driver, and it never left the toolkit. Syrup gives you the exact slow drip and wet shine you want, it holds color beautifully, and it tastes like sugar, so it’s the default for anything near an actor’s mouth.
The ratios that work
- 1 cup light corn syrup. The base. Light, not dark, so you control the color yourself.
- 2 tablespoons red food coloring. Start here. You can add more later; you can’t take it back.
- 1 teaspoon chocolate syrup or unsweetened cocoa. The real trick. A touch of brown drags the red away from candy and toward the dark, oxygen-poor look of actual blood.
- 1 tiny drop blue food coloring, optional but powerful. Real blood runs slightly cool, and one drop nudges your mix there without tipping it purple.
- 1 drop clear dish soap. Also optional. Helps the blood sheet off skin and fabric instead of beading, which you’ll care about at cleanup.
Warm the syrup first, ten seconds in the microwave is plenty, then stir the colorings in slowly and stop the second it looks right. Overmixing whips in air bubbles, and bubbles read as foam, and foam reads as a mistake. If a batch thickens after sitting, a spoonful of warm water brings the viscosity back. And taste it if it goes anywhere near someone’s mouth. A batch that’s mostly dye will get spat out on camera, and that ruins more takes than wrong color ever has.
The Washable Workhorse: Dish Soap Blood
Best for costumes, fights, and anywhere blood will soak in. Not for mouths.
When blood has to splash across a costume and actually leave in the wash, the base ingredient is clear liquid dish soap. Soap is a surfactant, which is the chemistry word for “stuff stuck to this lets go.” Mix one part clear soap with roughly two parts water, then color it with red food coloring plus that same single drop of blue. It runs thinner than syrup blood, closer to water, which is exactly what you want for splatter, sprays, fight choreography where blood has to fly in arcs rather than drip.
Two adjustments make this recipe usable. Use clear soap only; the blue-tinted bargain stuff will fight your color mixing all day. And add one tablespoon of corn syrup per cup anyway. That little bit restores the gloss and slows the run just enough that it stops looking like red water on camera, while the soap still runs the cleanup show.
What it won’t do is taste acceptable, so keep it off lips. For a throat gag where the actor has to drool blood, capsule the syrup recipe instead. Fill empty gelatin capsules (sold for vitamins at any pharmacy) and have the actor bite down on cue. They hold for hours in a pocket, release on command, and leave nothing to pick out of anyone’s teeth.
Chocolate Syrup, the Monochrome Cheat
Black-and-white shoots and photography only. Zero reason to use it in color.
The Hitchcock trick survives because it’s elegant. In monochrome, chocolate syrup has the right darkness, the right viscosity, and it rinses away with water. For a black-and-white short, a period horror piece, or high-contrast stills, a grocery-store bottle is your entire blood budget. Warm it slightly so it flows. That’s the whole trick.
In color it’s a non-starter, obviously. But even in black and white, test it. Digital sensors respond to color differently than 1960 film stock did, and some cameras render chocolate syrup a touch too warm, which gives the game away. Shoot ten seconds, check it on a real monitor, and only then commit a costume to it.
When to Just Buy a Bottle
Sometimes the right answer is a credit card. Professional stage blood from a theatrical supplier (Mehron, Ben Nye, Kryolan have all sold it for decades) runs about $10–20 a bottle, covers a whole short film, and arrives with color, viscosity, mouth-safety already solved. Houses like Mehron formulate the stuff to be skin-safe and fabric-friendlier than anything you’ll improvise, which is why theater crews reaching for a quick gag skip the kitchen entirely.
If you do buy, learn the three formats first. Liquid blood drips and runs. Gel blood sits where you put it, which matters for a wound that must hold its shape across a long take. Spray blood comes in pump bottles for wide splatter. Effects-heavy crews often carry all three on a big day, because one bottle asked to do every job will do each of them worse.
Where the homemade approach wins is volume. A script that calls for a cup of blood is a buy. A finale that calls for two gallons pumped down a hallway is another story. Mixing your own at a few dollars a batch stops being a compromise and becomes the only sensible move.

Getting the Color Right
Every recipe fails the same way. Perfect in the bowl, wrong on skin. A bowl is white and opaque; skin is warm, translucent, textured. The same red reads brighter against porcelain than against a forearm, so the workflow is test, then adjust, then retest on whatever will actually appear on camera.
Two levers exist. Blue and brown. Red straight from the bottle is warm, slightly orange; real blood’s darkness comes from cool undertones. One drop of blue per batch drags things toward maroon. Brown, whether chocolate syrup, cocoa, or a single drop of green (which is what brown is made of), kills the brightness. Between them you can tune from fresh cut to old wound without ever touching the red. Keep a reference photo of actual blood on your phone. Sounds grim. It’s standard practice, and it ends the guessing.
Lighting bends the result more than any ingredient. Warm tungsten pushes blood toward orange; cool LED panels drag it toward brown; direct sun flattens the gloss that sells wetness. That’s why the skin test happens under your actual set light rather than the kitchen bulb, and why a batch tuned at home can look wrong at the location. If your light runs warm, add the extra drop of blue a day early and let the batch sit overnight, because the color settles as the dye fully dissolves and you’ll be testing the batch you’ll actually shoot.
The tuning loop
- Smear a teaspoon on the back of your hand. Not in the bowl. On skin, under the same light you’ll shoot in.
- Photograph it with the actual camera. Phone screens lie about reds. Your camera doesn’t.
- Adjust one variable at a time. A drop of blue, then retest. A half-teaspoon of cocoa, then retest.
- Strain the finished batch through a coffee filter to catch cocoa clumps and dye specks that would read as debris on a close-up.

Patience here pays off in the edit. Blood that photographed correctly needs no color correction in post, and correcting blood is miserable work. Fixing red without wrecking skin tones is a fight you’ll lose more often than you win.
Why Some Blood Stains (and How to Make Sure Yours Doesn’t)
The chemistry fits in one paragraph. Food coloring is a dye, designed to bond to material and stay there. Sugar (corn syrup) makes that dye sticky, so it sits on fabric fibers instead of rinsing off, and heat, from a dryer, an iron, even a hot car, sets the whole mess permanently. The pros break at least one link in that chain, usually two. They thin the sugar, add a surfactant that releases the dye before it bonds, and keep heat nowhere near a bloodied costume until it’s had a cold rinse.
Which is why the soap recipe is the wardrobe-safe choice, and why the one-drop-of-dish-soap note matters even in the syrup version. If a stain survives anyway, the conservation folks at the American Institute for Conservation preach the same discipline museums use on textiles. It comes down to cold water first, gentle detergent, patience, no heat until the stain is completely gone. On set that becomes one rule everyone follows out loud.
Skin is easier. Soap and warm water lift syrup blood fine, and a little baby oil or makeup remover takes the tint off around prosthetics where a washcloth can’t reach. Still, stage a cleanup station with a bowl, a stack of washcloths, and a mirror near set. It saves twenty minutes of actor grumbling per blood change, and on a tight day that time goes straight back into your take count.
Running a Blood Gag on the Day
The recipes are the easy half. What separates a gag that works once from one that works all day is logistics, and it starts the night before. Mix then. Test on skin, strain, bottle. Fresh-mixed blood on the morning of a shoot means color-matching at 7 a.m. under pressure, and that’s how bowls of it end up on the floor.
On the day, stage it in order. Wardrobe test first, on the actual garment, so you know what it does to the fabric you’ll be shooting. Then apply, shoot fast, rinse between setups. Blood left on fabric for hours darkens and stiffens, so schedule the widest, bloodiest setups early and the clean dialogue coverage after the rinse. If a scene needs repeated blood over many takes, pre-load capsules or a small squeeze bottle so a reset takes seconds instead of minutes.

Think about how blood moves, because the camera will. Gravity does most of the work in a typical gag. A wound above the collarbone drips down the chest, and the drip rate quietly tells the audience how fresh the injury is. Spurts pulse. They don’t spray evenly; they kick once per beat, which is why squeeze bottles get pumped in short bursts rather than one long squirt. The same wound reads more dramatic high in the frame than at the waist. None of that needs gear. It needs a few seconds of reference footage and the patience to copy the rhythm.
A blood gag checklist
- Mixed and tested the night before. Color confirmed on skin, through the camera, under set light.
- Wardrobe tested. One hidden corner of the real garment, rinsed cold, confirmed clean.
- Delivery planned. Capsules for mouths, squeeze bottles for wounds, splatter-by-hand only if the actor agrees.
- Cleanup station ready. Cold water, washcloths, mirror, spare towels, and the no-heat rule stated out loud.
Follow that and blood stops being the scary part of your shoot. For the professionals it’s simply a prop — made in advance, applied with intent, washed away before anyone has time to worry. Honestly, that’s the real magic trick in practical effects, and it doesn’t take a single pixel.
Sources and further reading live at the stage blood and Kensington Gore reference pages, Dick Smith’s biography, the production history of Psycho, the American Institute for Conservation’s guidance on caring for textiles, and Mehron for professional stage blood. Recipes reflect widely used proportions from theater and indie-film practice.